| Document number | Revision |
|---|---|
| DOCU13517 | 1 |
OAuth Registration for Microsoft 365 / Azure AD
OAuth Registration for Microsoft 365 / Azure ADBackgroundIntroductionPrerequisitesGuidesRegister your applicationSet up client secret (application password)Add app permissionsAdd mailbox access permissionsCommon Issues
Background
This Document describes the process of adding and configuring OAuth for Microsoft 365 within Azure
Introduction
This document describes a way of settings up an App registration for use with Highstage. However, this might not be the only way of doing this. There might also be special constraints within the tenant or for a specific server that influence how this should be set up. So this guide should only be seen as guidance.
Prerequisites
- To make this work, you need to have access to your organisations Azure Tenant and have priviligies to make changes to the Azure AD. If you don't have an account there yet, create it. You also have to set up a tenant that represents your company.
- Log into Azure Portal, and select the tenant that fits the organization that has the mail-address for Highstage. If you administer more than one tenant, use Directories + subscriptions filter to select the tenant for whom to register an application.
Guides
Register your application
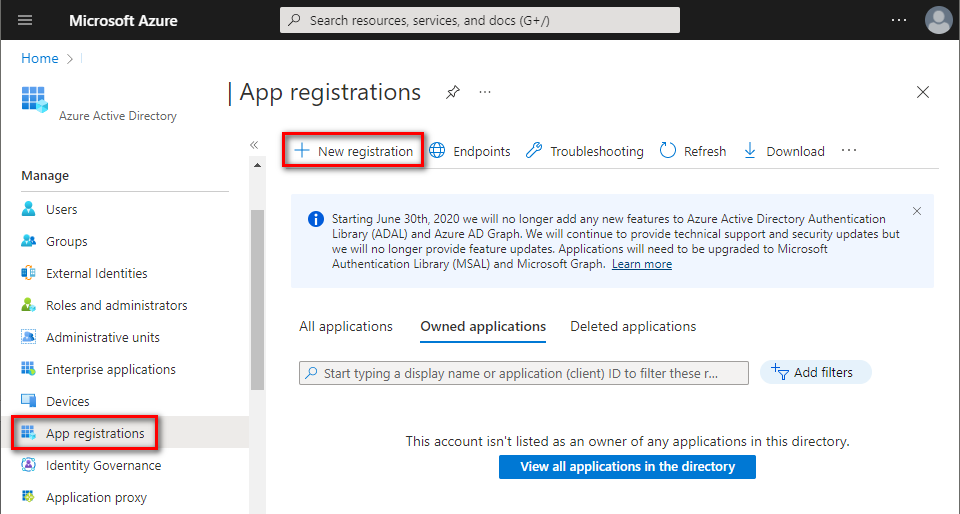
- In Azure Portal ⇒ expand the left menu ⇒ select Azure Active Directory ⇒ select App registrations ⇒ click + New registration. (Azure Portal is constantly evolving, so if you cannot find this page, use the search bar.)
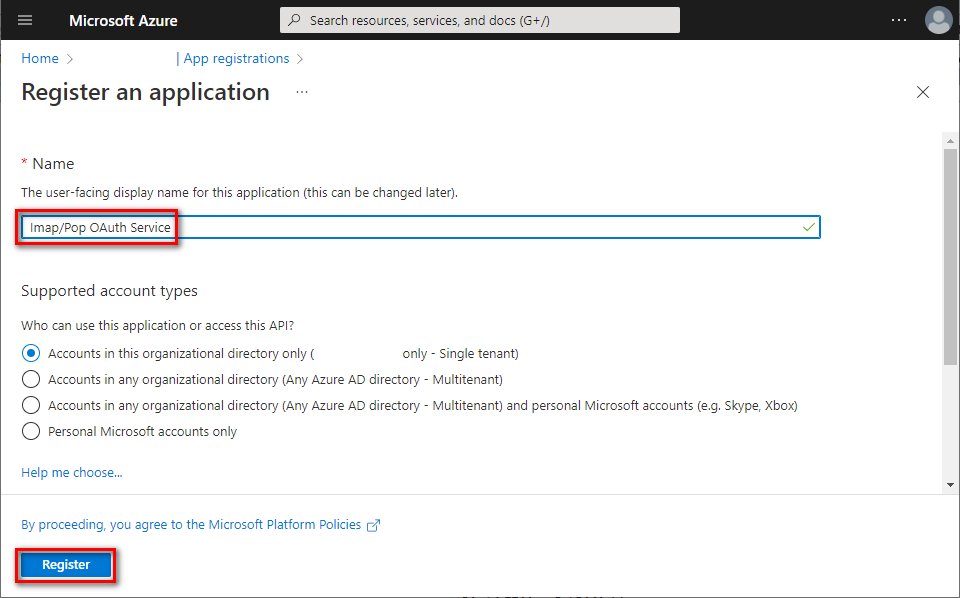
- Name your application, choose which kind of accounts are going to use it, and click [Register]. Note: This guide is suitable for single tenant account types. For other types, further steps might be different.
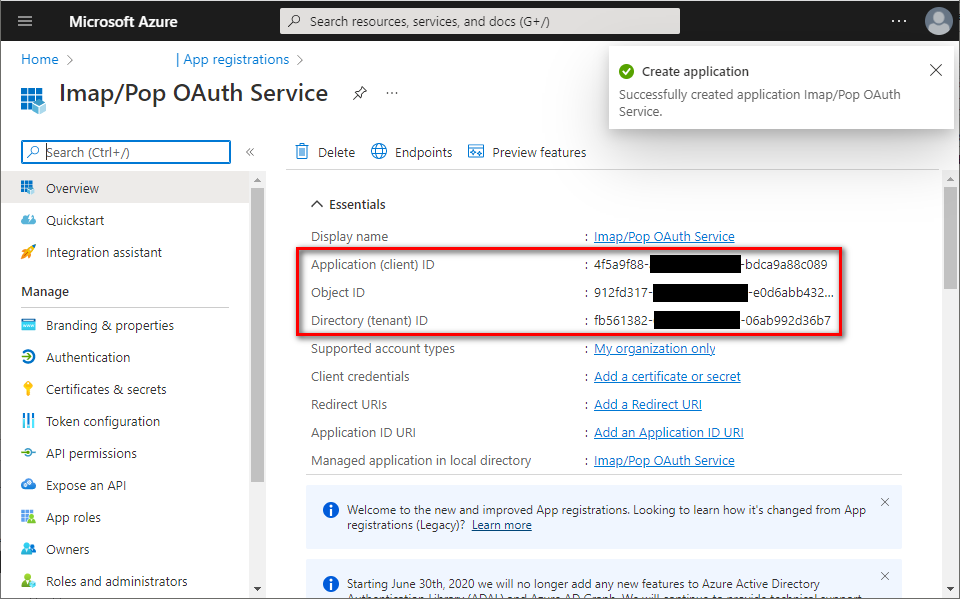
- You successfully registered your application and you can view its associated IDs. Some of them will be needed later to obtain an OAuth 2.0 token.
Set up client secret (application password)
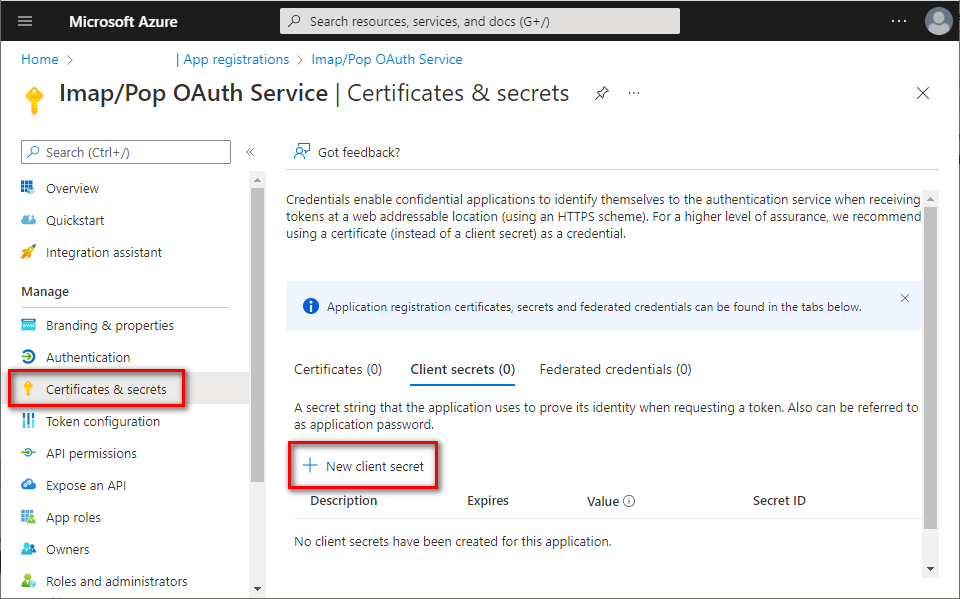
- In the left menu, select Certificates & secrets ⇒ click + New client secret.
- Provide some description for this secret, choose expiration period, and click Add.
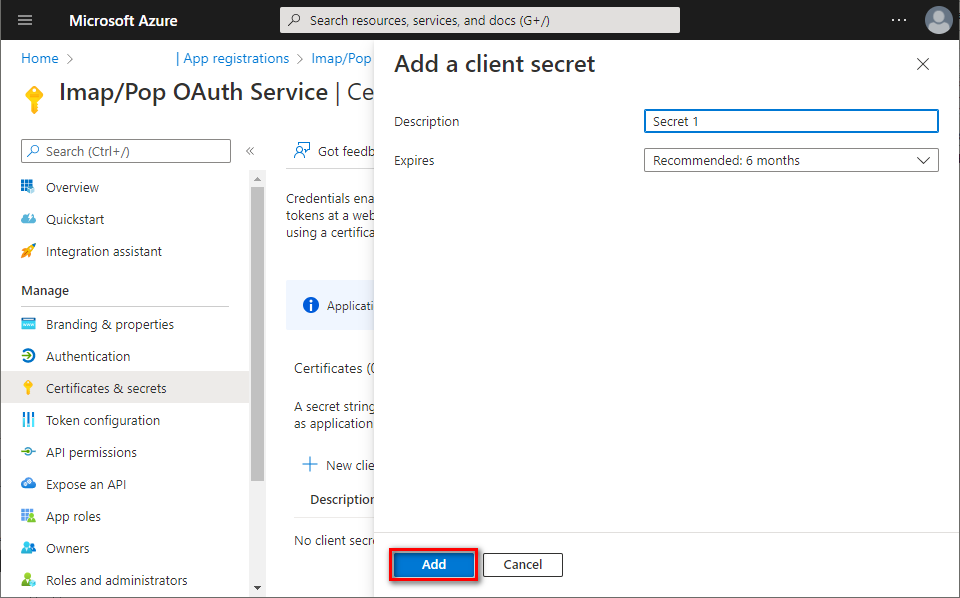
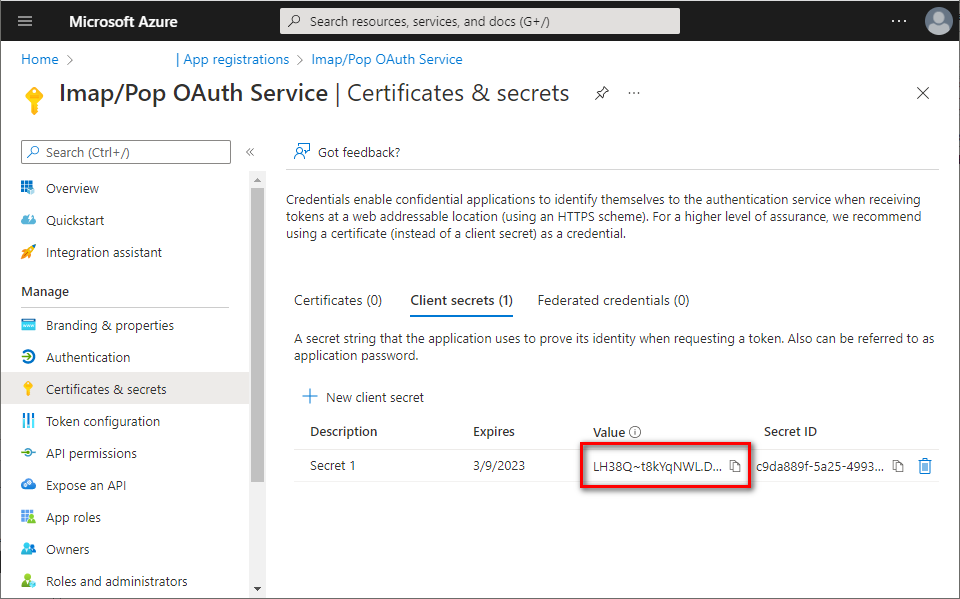
- Immediately copy and save the newly created client secret's Value (not Secret ID). You will not be able to view the Value later anymore.
Add app permissions
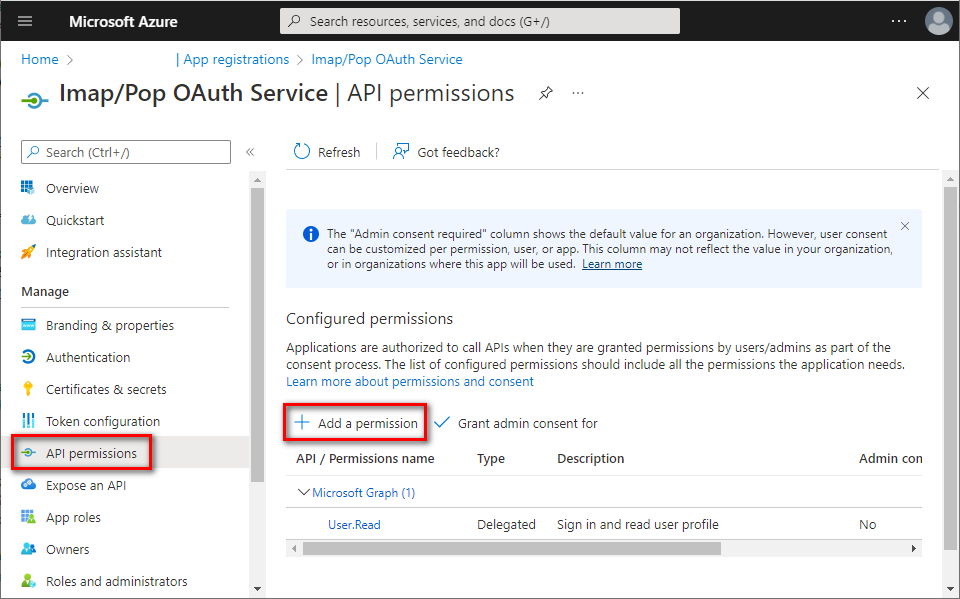
- In the left menu, select API permissions ⇒ click + Add a permission.
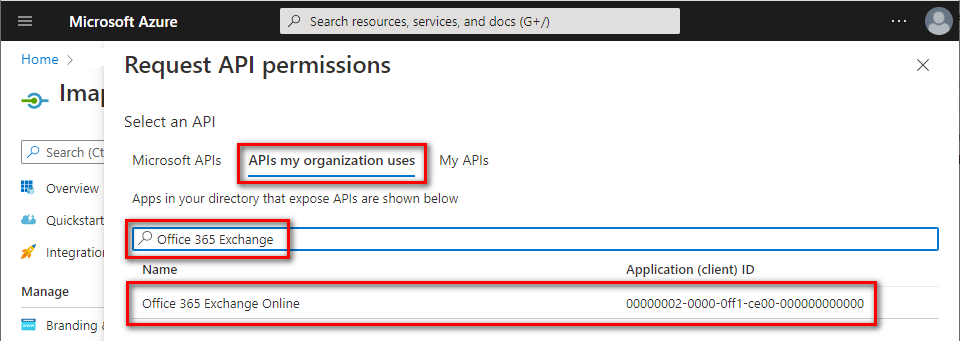
- Navigate to APIs my organization uses tab ⇒ type Office/Microsoft 365 Exchange in the search bar ⇒ click Office/Microsoft 365 Exchange Online entry.
- Click Application permissions ⇒ type
AccessAsApp⇒ checkIMAP.AccessAsAppand/orPOP.AccessAsApp⇒ click [Add permissions].
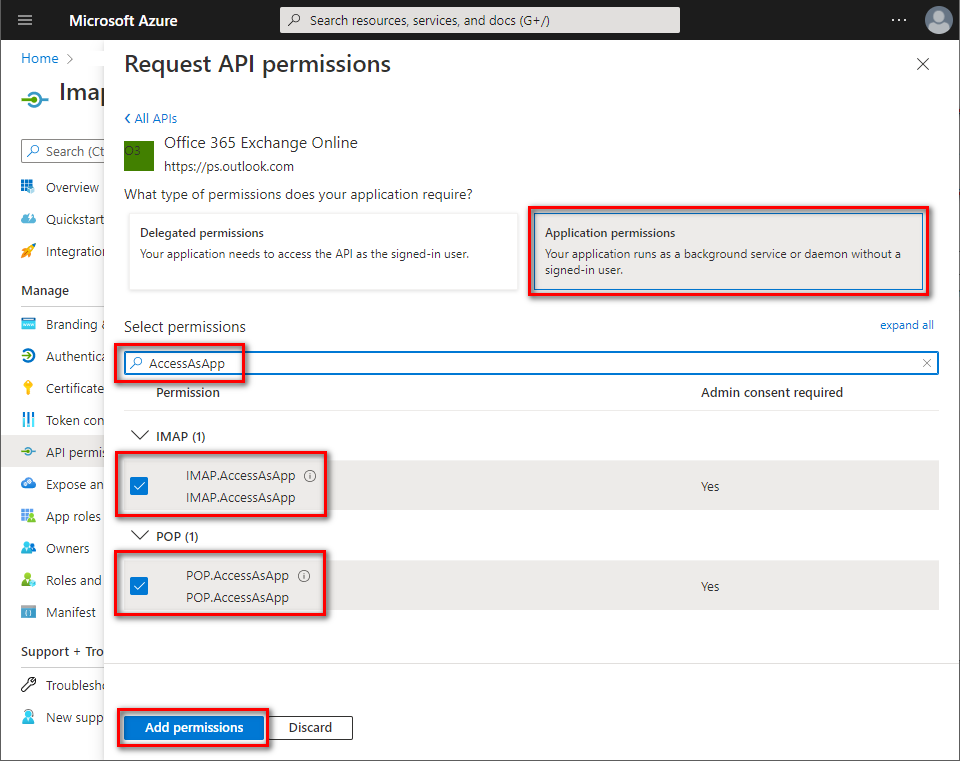
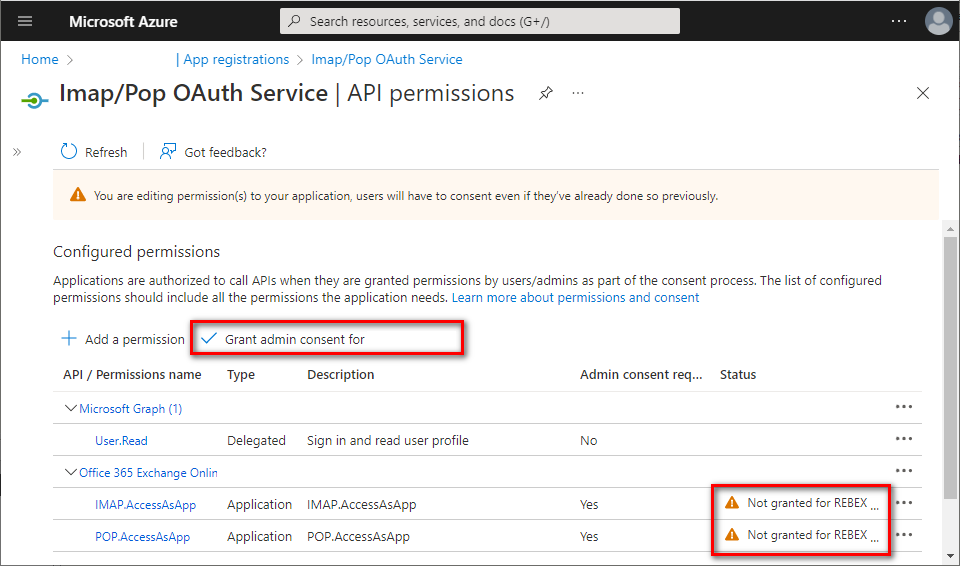
- The newly-added
IMAP.AccessAsAppandPOP.AccessAsApppermissions have to be approved by your organization's administrator. Ask them to grant consent to your application by clicking Grant admin consent for [organization].
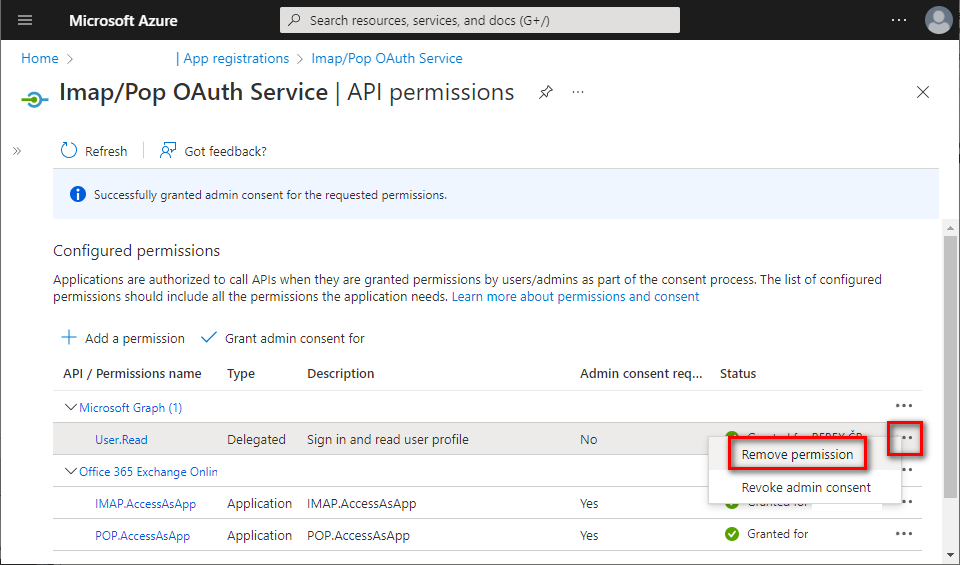
- Application permissions have been granted. Optionally, you can remove the delegated
User.Readpermission which is not needed for app-only application - click the context menu on the right side of the permission and select [Remove permission].
Add mailbox access permissions
- Now, you have to assign access permissions for your mailboxes. There is no web UI for this yet - you have to use PowerShell.
- Install the required PowerShell modules.
Note: You can skip this step if you have already installed
AzureADandExchangeOnlineManagementmodules. Open your PowerShell as Administrator, and run:
Install-Module -Name AzureADInstall-Module -Name ExchangeOnlineManagementConfirm installation from PSGallery by typing Y + Enter.

(Wondering why these modules install from an untrusted repository? See this answer to Azure-PowerShell issue.)
- Get the service principal ID associated with your application. Note: You will be asked to log into your Azure account.
x$AppId = "YOUR_APP_ID_HERE"$TenantId = "YOUR_TENANT_ID_HERE"
Import-module AzureADConnect-AzureAd -Tenant $TenantId
($Principal = Get-AzureADServicePrincipal -filter "AppId eq '$AppId'")$PrincipalId = $Principal.ObjectId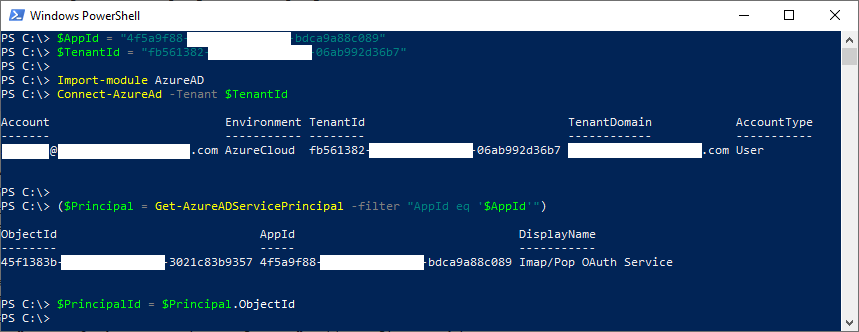
- Register the service principal for your application. Note: You will be asked to log into your Exchange Online account.
xxxxxxxxxx$DisplayName = "Some principal name for IMAP/POP3 here"
Import-module ExchangeOnlineManagementConnect-ExchangeOnline -Organization $TenantId
New-ServicePrincipal -AppId $AppId -ServiceId $PrincipalId -DisplayName $DisplayName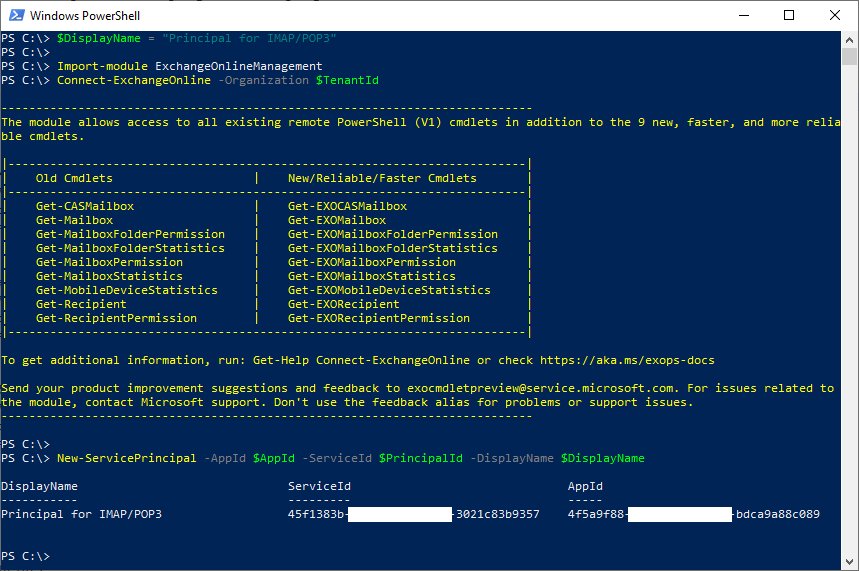
- Add FullAccess mailbox permissions to all mailboxes you want to access from your application.
xxxxxxxxxxAdd-MailboxPermission -User $PrincipalId -AccessRights FullAccess -Identity "mailbox.1@example.org"Add-MailboxPermission -User $PrincipalId -AccessRights FullAccess -Identity "mailbox.2@example.org"Add-MailboxPermission -User $PrincipalId -AccessRights FullAccess -Identity "mailbox.3@example.org" - Congratulations! Now you have registered an application for accessing Office/Microsoft 365 mailboxes via IMAP or POP3 protocol and received its Application (client) ID, Client secret and Directory (tenant) ID.
These strings are going to be used by your application to authenticate to Microsoft 365 via OAuth 2.0 and receive an OAuth token. This token is then used to authenticate to Exchange Online using IMAP or POP3 protocols.
Common Issues
- Make sure you used correct IDs in PowerShell cmdlets. If the IDs are mismatched, your app will be able to request an access token, but won't be able to use it to access mailboxes.
- Use an up-to-date version of Rebex IMAP or POP3. Old versions have not been tested with contemporary Exchange Online. They might still work, but if you encounter any issues, please try the latest release.
- This guide is only suitable for IMAP and POP3. For Exchange Web Services guide, This guide dont apply
- Microsoft 365 does not support app-only authentication for SMTP yet. However, it will still be possible to enable username/password authentication for SMTP after fall 2022.
