| Document number | Revision |
|---|---|
| DOCU12527 | 1 |
Highstage Sub applications
Highstage Sub applicationsBackgroundIntroductionHighstage default installationInstallationCreating a new Highstage sub applicationsInitial setup of new Highstage sub applicationsConfigurationSecurity and AccessibilityGranting access to sub applicationsMaking data available in sub applicationsContents and Layout
Background
Highstage enables a single Highstage application to include a large number of additional sub applications. These sub applications are based on the same Highstage data- and codebase and allows for partial or full access to data and functionality in Highstage for various stakeholders through their own dedicated instance of Highstage.

In this article, you will be introduced to setting up, configuring and maintaining sub applications.
Introduction
Sub applications allows for multi-tier access to existing data and functionality without granting access to the primary Highstage application.
Highstage comes bundled with a default Highstage application named TS. This is the primary entry point to Highstage for people within the organization. However, Highstage allows for up to 256 Sub-application to be used at the same time where each sub application can have it's own individual accessibility, security and layout configurations.
Sub applications enables administrators to customize explicit, unique and relevant Highstage experiences for particular groups, divisions or teams which only requires access to a subset of data or features in Highstage.
An example of usage of Highstage sub applications could be reflected in a configuration where the SALES department has access to a certain amount of data and ENGINEERING has access to some other data:
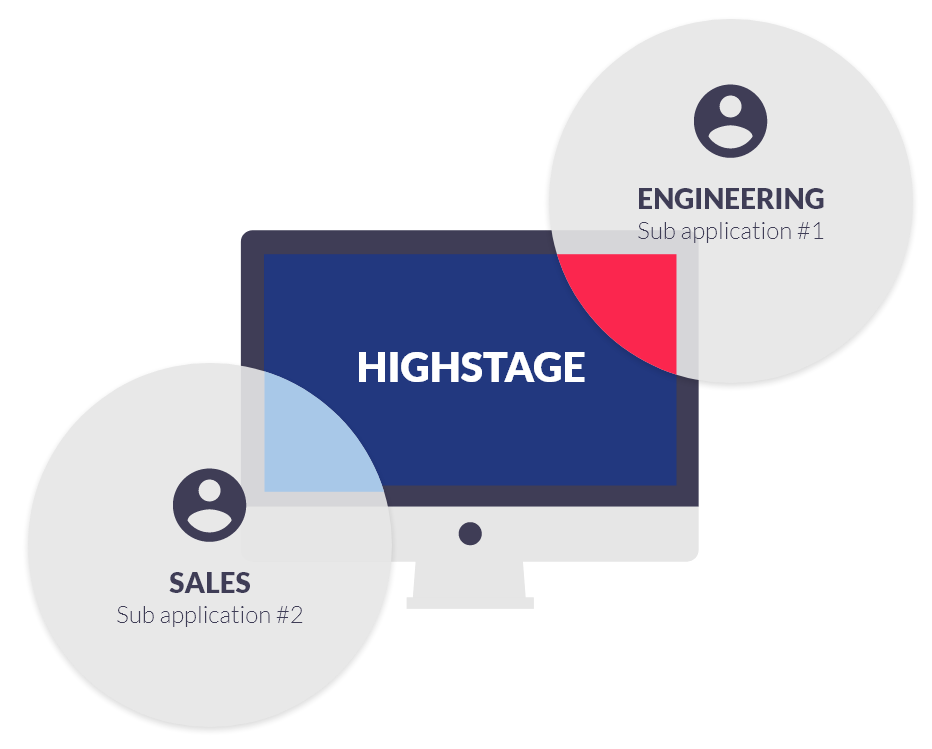
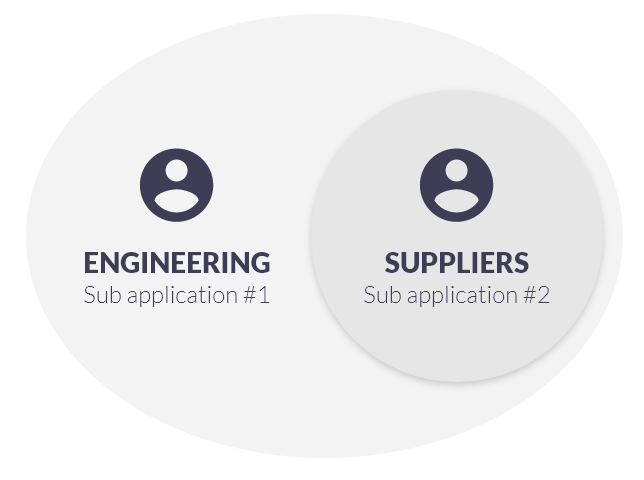
The data accessibility can be customized for each individual sub application. It is also possible to create sub applications which has access to a subset of data and functionality of another Highstage sub application:
Highstage default installation
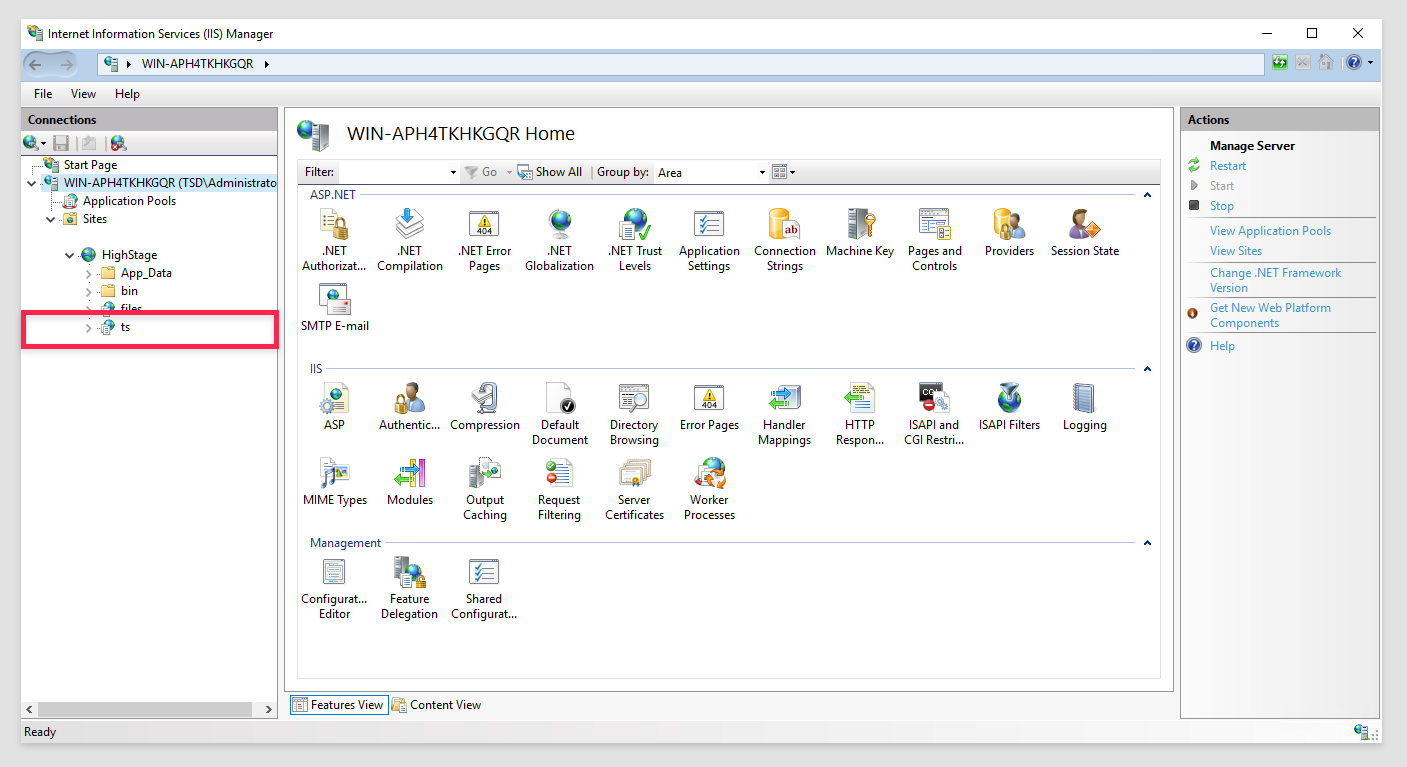
In a default Highstage installation, the ts application is used the primary Highstage web application:
Note: Highstage installations are managed through Internet Information Services (IIS) Manager on the designated server where Highstage is located.
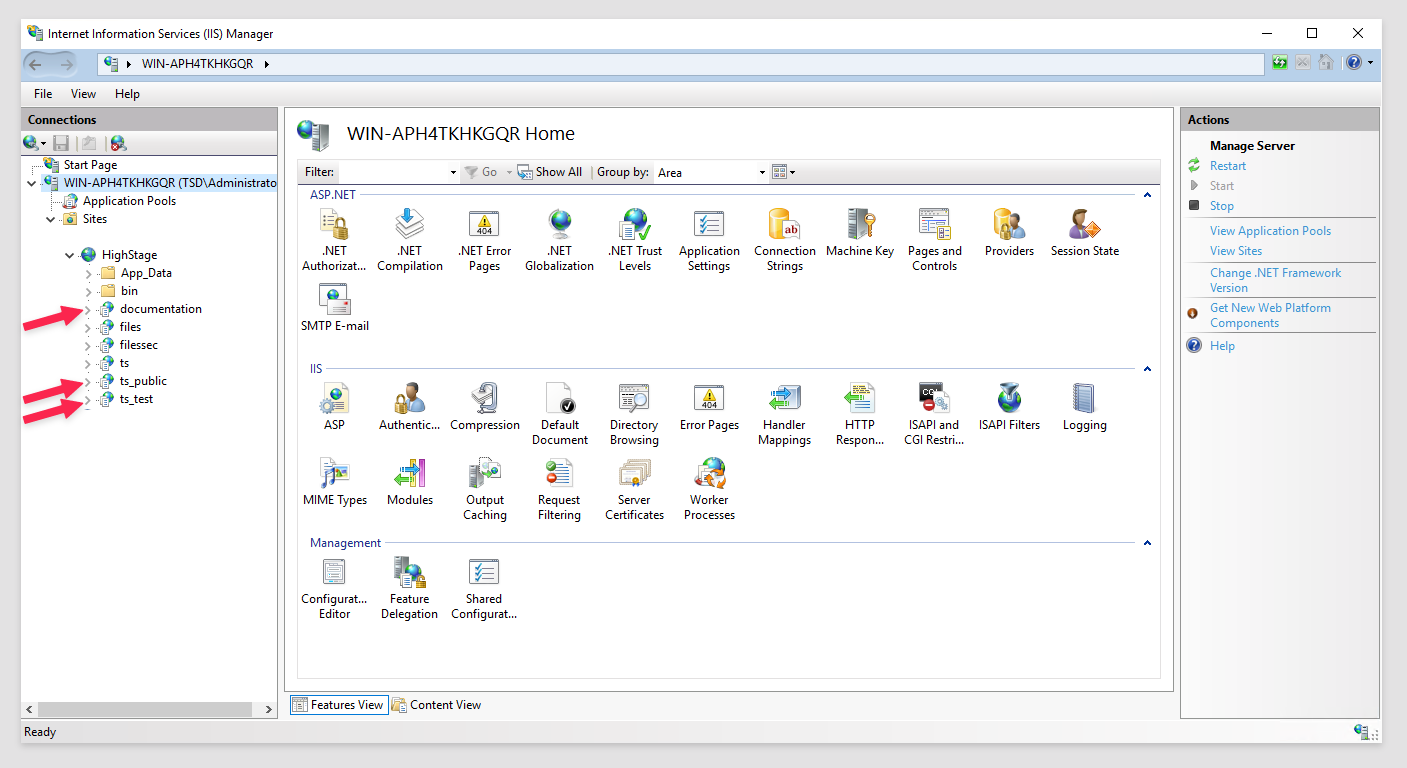
Each sub application is added as an additional application to the primary Highstage web application:
Installation
Important!
Installing new Highstage sub applications requires restarting the Internet Information Services (IIS) Manager. Ensure that no users are actively using Highstage whilst restarting IIS. We further recommend testing sub applications on a dedicated test server.
The following instructions will guide you through the Installation, Initial Setup and Security configuration of Highstage sub applications.
All guides must be completed for new sub applications but can be revisited individually for configuration of existing Highstage sub applications.
Creating a new Highstage sub applications
- Open Internet Information Services (IIS) Manager and expand Sites in the Connections menu:
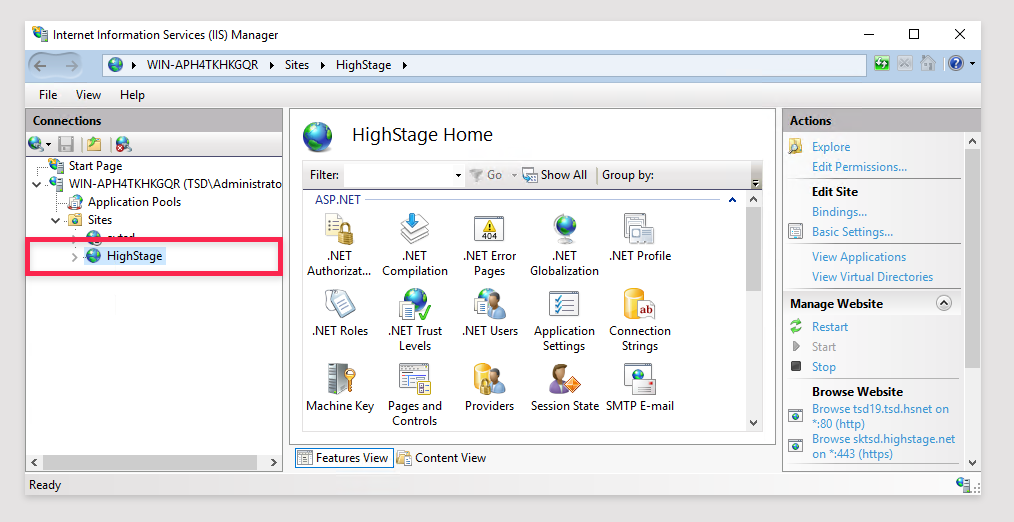
- Right Click the Highstage web application and select [Add Application...]:

Fill out the form with appropriate information about the new sub application:
- Alias: Name of the sub application
- Physical path: Path to the pre-existing
ts_WebAppfolder directory in your Highstage installation (Path might be different in your installation).
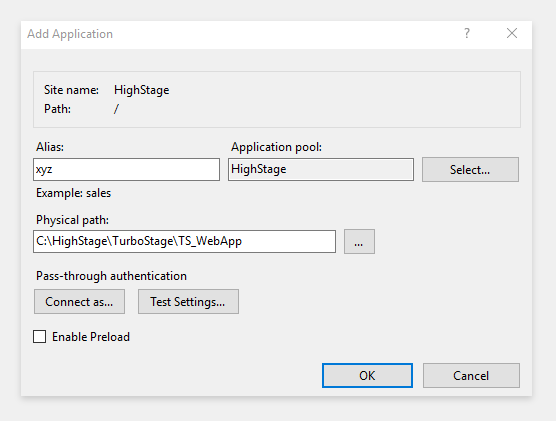
- Click OK to create the new sub application:
NOTE: The new sub application has not yet been configured. Please refer to the Initial setup for instructions on how to make appropriate changes in your primary Highstage installation to support additional sub applications.
Initial setup of new Highstage sub applications
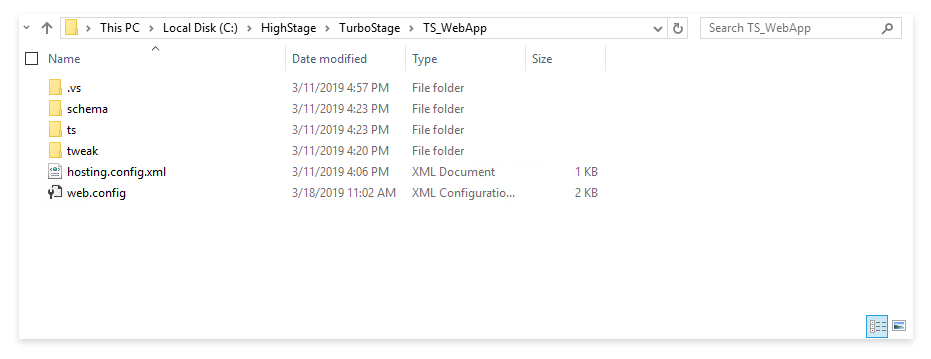
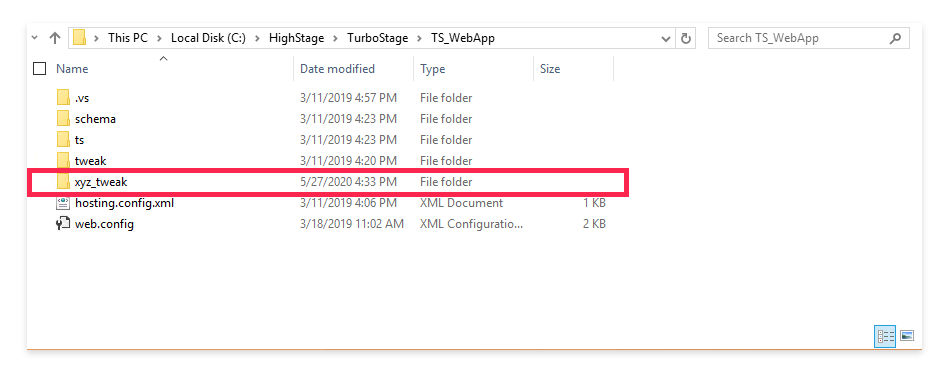
- Access the
TS_WebAppfolder in your Highstage installation (Path might differ for your Highstage installation - but can be found in the root directory of your Highstage installation folder or accessed directly from the IIS Manager):
- Create a new unique
tweakfolder to be used by the newly created sub application:
You can take a copy of the existing tweak folder to include all preexisting customizations from your primary Highstage application or create a new tweak folder containing only the minimum required files and definitions to fully reconfigure the sub application.
Click here to download a tweak folder with all essential files and definitions to run the sub application.
- Open
web.config.xmllocated in theTS_WebAppfolder and paste in the following:
<appSettings> <add key="xyz:TweakPath" value="A" /> <add key="xyz:SchemaFile" value="B" /> <add key="xyz:WebRootClient" value="C" /></appSettings>Important! Place the snippet within the existing
<configuration>element in theweb.config.xmlfile.
Please change the following values in the provided snippet accordingly:
- Replace all occurrences of
xyzwith the name of your sub application. - Replace
Awith the path to the newly created tweak folder (eg.C:\HighStage\TurboStage\TS_WebApp\xyz_tweak). - Replace
Bwith the name of the primary schema file located in thetweakfolder (eg.xyc.custom.schema.xml). - Replace
Cwith the desired entry URL to the sub application (e.g.https://company.highstage.net/xyz).
- Replace all occurrences of
Tip! Additional parameter can be configured, or existing parameters overwritten, for a sub application through additional
<add>elements within the<appSettings>element as specified in Step 3.xxxxxxxxxx<add key="SUBAPPLICATIONNAME:PARAMETER" value="VALUES" />Replace
SUBAPPLICATIONNAMEwith the name of your sub application. ReplacePARAMETERwith the name of the Highstage parameter andVALUEwith appropriate values.This enables you to configure parameters explicitly for the sub application without modifying the existing parameters in your primary Highstage installation.
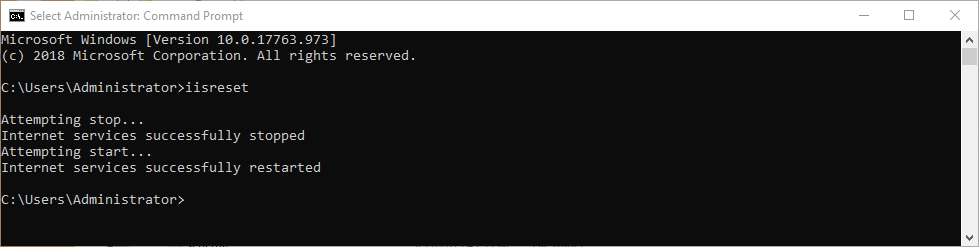
Save and close the
web.config.xmlfile.Please reset the IIS by doing the following:
- Open a Command Prompt terminal.
- Type in
iisresetand click Enter.
This command will make IIS reset all processes and reload the application pools. After this restart the new sub application will be loaded and can be configured:
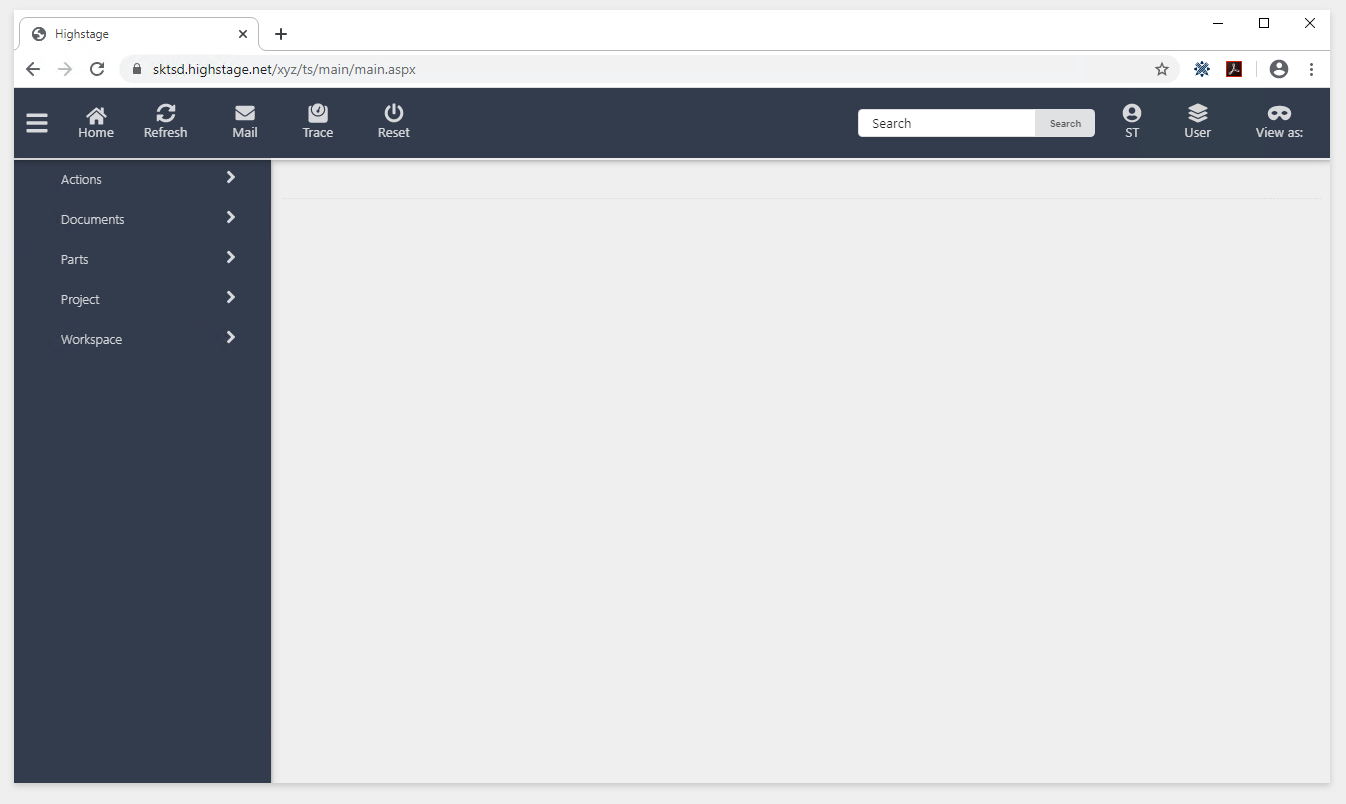
- Open a browser window and navigate to the
URL(eg.https:/company.highstage.net/xyz) associated with the newly created sub application as specified in Step 4:
Configuration
The following instructions will guide you through the Security and Accessibility configuration and Content and Layout configuration of existing Highstage sub applications.
Security and Accessibility
Granting access to sub applications
Making data available in sub applications
Notes
- Add any number of groups as values to the parameter
LdapUserGroups. - Navigate to SYSTEM > LDAP > ADSI (default) and select Replicate to replicate all users and groups into Highstage.
This makes the listed users/groups available for use.
Contents and Layout
